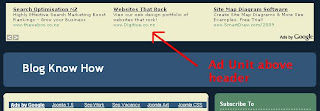
One of my readers asked me how to add a Google Adsense ad unit above the header of a Blogger Blogspot blog. Rather than post a long reply I decided to write an article about it so that others looking for help to place an affiliate banner or Google Adsense banner at the top of their blog will find the solution more easily.
To set up Blogger so that ad units can be placed above the header requires the addition of a snippet of code to your Blogger Template. I have aimed this tutorial at beginners and newbies to Blogger. The tweak can be performed in less than 5 minutes.

How to Add a Google Adsense Ad Unit or an Affiliate Banner Above the Blogger Header
1. Login to Blogger if not already logged in
2. Navigate to Layout > Edit HTML
3. As a precaution back up your template by downloading the full template to your computer
4. Tick the Expand Widget Templates box
5. Using CTRL + F to bring up the search box find this line which in most templates will be directly after <body> tag
<div id='outer-wrapper'>6. Paste this block of code after this line to create a new section
<div id='topads-wrapper'>

<b:section class='topads' id='topads' preferred='yes'/>

</div>
7. Next we need to add some CSS styling to the new section. Please note that the banner will be centered by default. If you want to change the alignment for some reason you just need to change the CSS styling.
Place the following code in the head section of your template before these lines:
]]></b:skin>

</head>
/* Top Ads
----------------------------------------------- */
#topads-wrapper {
margin: 0;
padding: 0;
position: relative;
text-align: center;
width: 100%;
}
#topads {margin: 0; padding: 0;}
#topads .widget {margin: 0; padding: 5px 0;}
8. Click the Save Template button
9. Go to Layout > Page Elements
10. You will now see that you can add a gadget to a new section above your header and directly below the navbar.